Citrix – Netscaler – Rewrite – Force Secure and HttpOnly Cookies

Using the following article we stumbled upon a configuration where two cookies had been inserted in the response traffic from a web server.
This method instructs web browsers to only return the cookie value when the transmission is SSL-encrypted. This option can be used to prevent cookie theft through connection eavesdropping.
http://support.citrix.com/article/CTX138055
The configuration below ensures both actions are executed

ns-nsroot:11:30> sh ns runningConfig | grep -i secure_cookie
add rewrite action act_secure_cookie-upcaseP replace_all http.RES.full_Header “\”Path=/; Secure; HttpOnly\”” -search “regex(re!(Path=/\\; Secure; HttpOnly)|(Path=/\\; Secure)|(Path=/\\; HttpOnly)|(Path=/)!)” -bypassSafetyCheck YES
add rewrite action act_secure_cookie_lowcasep replace_all http.RES.full_Header “\”path=/; secure; httponly\”” -search “regex(re!(path=/\\; secure; httponly)|(path=/\\; secure)|(path=/\\; httponly)|(path=/)!)” -bypassSafetyCheck YES
add rewrite policy pol_secure_cookie-lowcasep “http.RES.HEADER(\”Set-Cookie\”).EXISTS” act_secure_cookie_lowcasep
add rewrite policy pol_secure_cookie-upcaseP “http.RES.HEADER(\”Set-Cookie\”).EXISTS” act_secure_cookie-upcaseP
bind cs vserver csw_extranet.example.co.za_80 -policyName pol_secure_cookie-lowcasep -priority 100 -gotoPriorityExpression NEXT -type RESPONSE
bind cs vserver csw_extranet-.example.co.za_80 -policyName pol_secure_cookie-upcaseP -priority 110 -gotoPriorityExpression END -type RESPONSE

Citrix – Netscaler – HA Pair Design

Attached is a basic design of a multi tenanted high available application delivery controller environment, using Citrix Netscaler as the chosen technology provider accelerating and optimizing different application frameworks.

Citrix NetScaler makes apps and cloud-based services run five times better by offloading application and database servers, accelerating app and service performance, and integrating security.

When deployed in front of web servers and database servers, The NetScaler combines high-speed load balancing and content switching, data compression, content caching, SSL acceleration, network optimization and application security on a single, comprehensive platform.


Citrix – Netscaler – Weblogging overview

You might find yourself in a situation where Edgesight isn’t able to provide performance metrics on certain applications due to its design. Example a non-browser based application; submitting HTTP/HTTPS traffic to and from backend servers.

The following diagram should assist providing a basic understanding of the components involved when configuring web logging.

Web logging is a mechanism used for making transaction data (performance metrics + events) available in a buffer for review.

Citrix – Netscaler – Trace that packet

There’s going to be a time when you’ll need to dig a little deeper into the flow of communication traversed through the Netscaler. I found the following commands and tools very helpful which I’m going to walkthrough a wee bit.

1# Show connectiontable,

Similar to getting directions from your Grandmother.

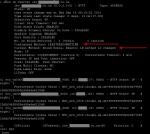
If you want to ensure that clients are establishing connection to your Virtual IP’s in quick and easy way, you can view the connection table on the Netscaler example below.

Figure 1.
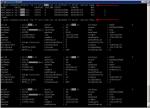
Note: if you don’t want to use a expression filter you can simply use grep –i “” like the following

Command: show connectiontable | grep -i “10.7.?.113” |grep -i “HTTP”

2# nstcpdump,

Similar to Google maps it’ll get you there, but you might miss that off ramp.

A good way to view the network activity of a particular host you can use nstcpdump.sh which can be very helpful for low level troubleshooting.

– The benefit using this command is that it has the ability to send packet capture data directly live to standard output.

Note: The following Citrix KB will equip you with all you need to know

http://support.citrix.com/article/CTX118185

We found ourselves using nstcpdump when we needed to verify if any arp packets where being submitted via a particular gateway / route.

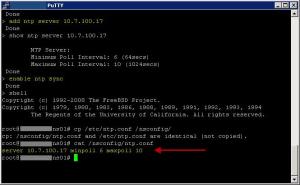
Figure 2. Remember to you’ll need to shell in 1st, -X option displays the content of each packet.

3# nstrace,

Pinpoint navigation the Tom, Tom of the Netscaler packet analysis world

At times, you might need the complete output of the nstrace.sh script for a full analysis of a particular issue.

– It allows capturing packets in the native trace format, which provides NIC device information including device number and whether the packet was transmitted or received.

– It provides connection link information, allowing for the identification of links between client to vserver and SNIP/MIP to server tcp connections.

Note: The following Citrix KB will equip you with all you need to know

http://support.citrix.com/article/CTX122294

And if ever in the situation where you’ll need to manually stop a trace process quick read the following

http://support.citrix.com/article/CTX128889

Figure 3. To stop a trace press Ctrl + C will kill the process within your putty session.

If your requirement is to see communication from all Netscaler owned IP addresses it’s properly better to execute the trace without any filters and within your packet analyzer perform the necessary filtering. You’ll need to download the trace file by using the GUI simply enough see the following.

Figure 5.

Note: Once you have downloaded that trace file, its packet analyzing time goto http://www.wireshark.org/

There are great video’s to get you started in understanding the utility some screens I have provided demonstrating this great tool.

Figure 6. Press Ctrl + F The following will assist you finding the source IP of your client requesting a particular service.

Figure 7. The following screen shot demonstrates the flow of communication from the client request to the backend servers. For easy of viewing you’ll be able to apply filters and even follow the TCP Stream.

I hope this has proven helpful.

Citrix – XenApp 6.5 – Installation Guide for Administrators

Welcome to our XenApp 6.5 Installation Guide for Administrators

1.0 XENAPP 6.5 DEPLOYMENT

This post is a configuration guide for an administrator to assist in joining a 2008 R2 server to a XenApp 6.5 Citrix Farm.

1.1 FARM DESIGN – OVERVIEW

1.2 BASE BUILD

1.2.1 Server Resource Specifications

Server 2008 R2 Standard x64

4 Gigs Memory

2 Processors

60 Gig HDD

1.2.2 SECURITY GROUP ASSIGNMENT

Manage access to your citrix servers using Group Policies. Use Security Groups for your server objects. Once the server is joined to the domain – add the server object to the secuirty group in AD that reflects the environment it will service.

1.3 XENAPP PREREQUISITS

The XenApp Server Role
Manager deploys the following software (except as noted), if it is not already installed:

  • .NET Framework 3.5 SP1 (this is a prerequisite for the XenApp Server
    Role Manager; it is deployed automatically when you choose to add the
    XenApp server role from the Autorun menu)
  • Windows Server Remote Desktop Services role (if you do not have
    this prerequisite installed, the Server Role Manager installs it and enables
    the RDP client connection option; you will be asked to restart the server
    and resume the installation when you log on again)
  • Windows Application Server role
  • Microsoft Visual C++ 2005 SP1 Redistributable (x64)
  • Microsoft Visual C++ 2008 SP1 Redistributable (x64)

1.4 INSTALLING XENAPP

  • Run “autorun.exe”
  • Click “Install XenApp Server
  • Click “OK” to install .Net 3.5 SP1
  • Click to Add Server Roles
  • Install Enterprise Edition
  • Accept the License Agreement
  • Select the XenApp Role and click “Next”
  • Remove Xenapp Management and Windows Desktop Experience Integration. Click Next
  • Review the prerequisites and click next, and install
  • Reboot Server as requested
  • Log back in, the Xenapp Server Role Manager will open again. Click on Add or remove server roles.

(Ignore the Reboot message – That won’t go away no matter how many times you reboot )

  • Click on Add Server Roles and accept the License agreement
  • Add XenApp again and click Next
  • Remove Xenapp Management and Windows Desktop Experience Integration. Click Next
  • Review the prerequisites and click next, and install. Install can take up too 30 mins.
  • Click Finish

4.4.2 CONFIGURING XENAPP SERVER

  • Open the Citrix Xenapp Server Role Manager
  • Under Server Configuration Tasks, click on Specify Licensing
  • On the License Configuration screen, enter (Name of your Citrix License Server) as the License Server, or choose to Configure the license
    server later using policy if you have specified the license server in your farm policies. Click Next.
  • Choose XenApp as the model in the the Licensing Model Screen and click apply
  • You will return to the XenApp Server Role Manager screen
  • Click on “Configure” under the Server Configuration Tasks
  • Click Add this server to an existing server farm
  • Choose Existing Microsoft SQL Server database and click next
  • Enter the name of your Database Server and the database name. Choose “SQL Server authentication using a login ID and password to access the database”.
  • Test the connection and click next
  • On the Configure Shadowing screen leave the default of allow and click next
  • Under Specify Advanced Server Settings, configure the following:

(BE AWARE THERE IS 4 SETTINGS TO CONFIGURE ON THIS PAGE BEFORE CLICKING NEXT)

  • Data Collection
    • § Enable Session-host mode if you want to limit the data collector to specific servers
    • § Use a custom Zone name or accept the default
    • XML Service
      • § Use a custom XML Service TCP/IP Port : 8080 if you choose not to integrate with IIS and you changed your XML service port
      • Receiver
        • § Leave Blank (You can configure this lately should you need to use it
        • Remote Desktop Users
          • § Only select “Add the Authenticated Users”. Deselect the default option. Click Next. Click Apply
          • § Click Finish. Reboot the Server.

And All Done!